Getting started with Consent: add a site and paste one line
You need a fewbase account and access to the HTML of your site.
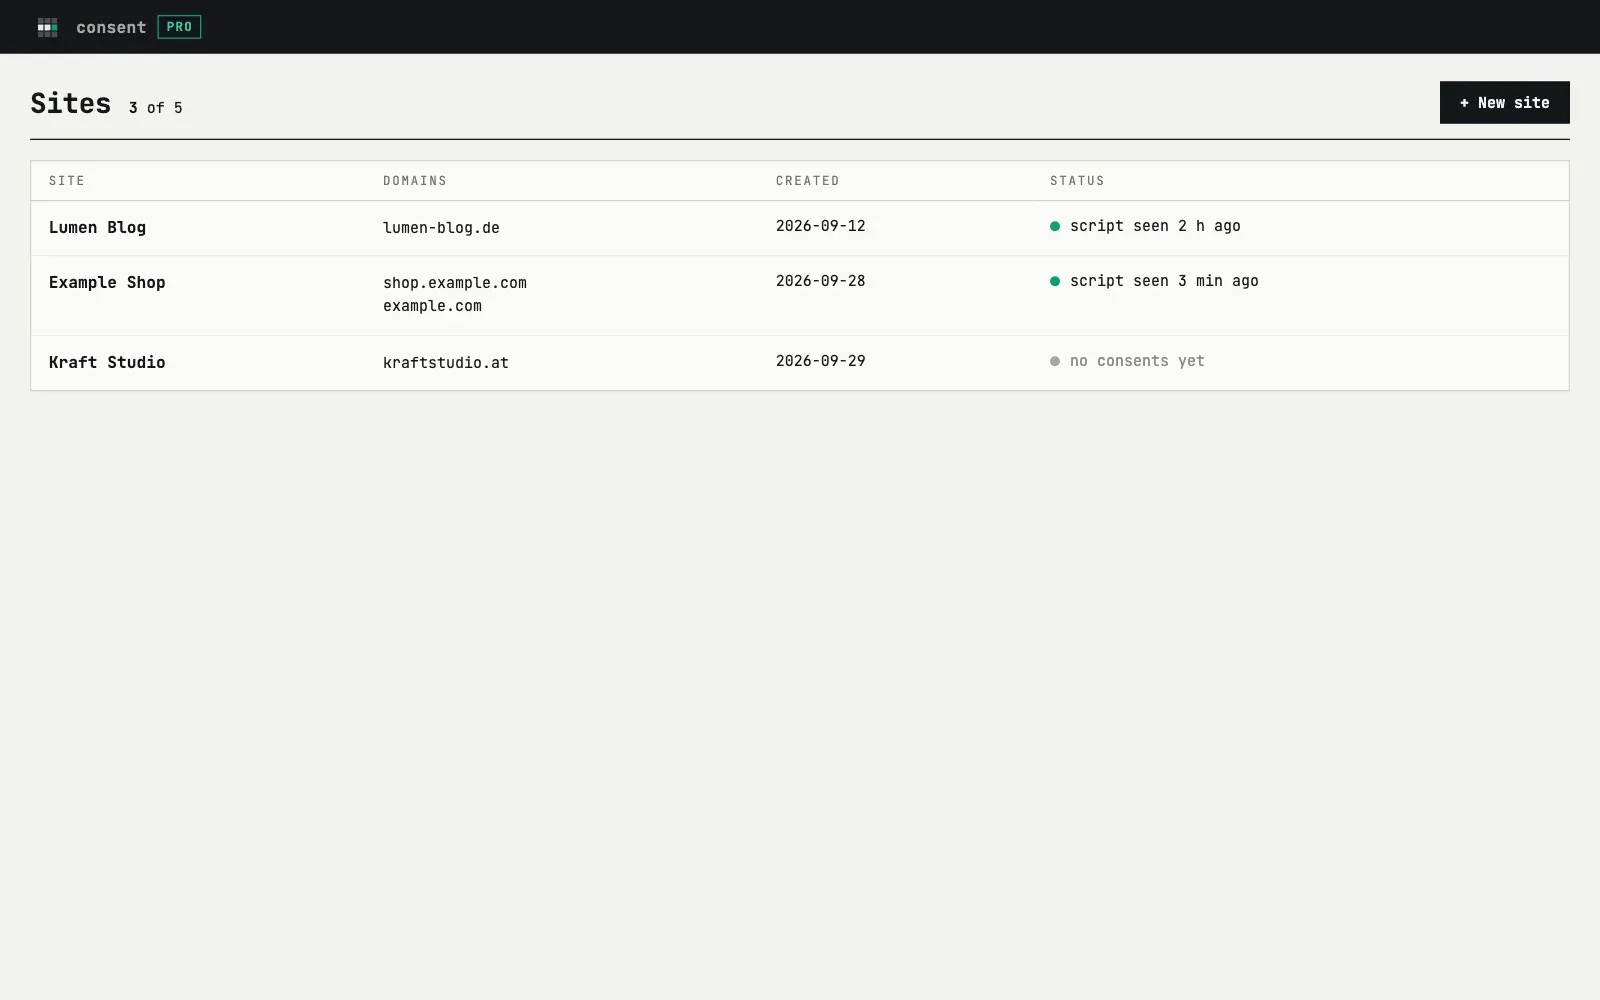
1. Add your site
Section titled “1. Add your site”Open Consent and press New site. Enter a
name and a domain. The name is only for you. The domain is where the banner
will run, for example shop.example.com. Write the host only, without
https:// or a path.
2. Paste the line of code
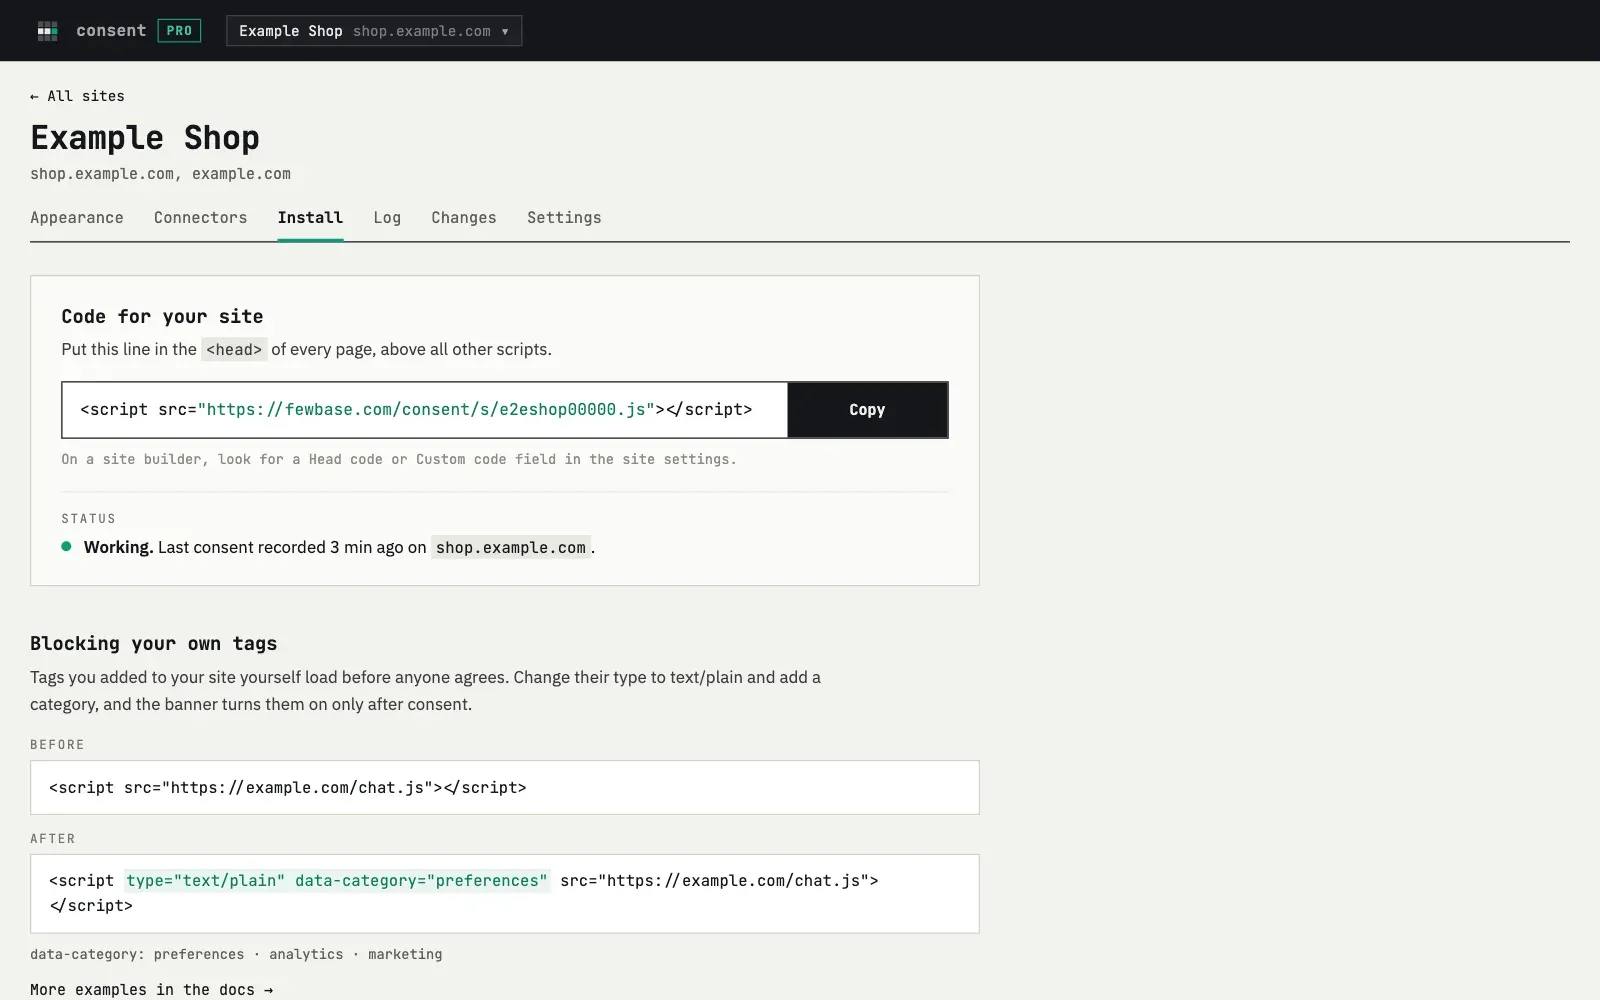
Section titled “2. Paste the line of code”Open the Install tab and copy the line. Paste it into the <head> of
every page, above all your other scripts. If you use a site builder, look
for a “Head code” or “Custom code” field in its settings.
<script src="https://fewbase.com/consent/s/YOUR-SITE-ID.js"></script>Do not add async or defer. The script should run first, so that it can
hold back your other tags until the visitor chooses.
3. Connect your tools
Section titled “3. Connect your tools”If Google Analytics, Google Tag Manager or another tool is already on your site, the banner cannot hold it back by itself. Do one of these:
- Remove the tool’s code from your site and add its ID on the Connectors tab. See Connectors.
- Keep the code and mark it. See Your own tags.
4. Check that it works
Section titled “4. Check that it works”Open your site in a private window. You should see the banner. Make a choice, then go back to the Install tab. The status changes to “Working” and shows when the last consent arrived and from which domain. Your choice also appears in the consent log.
The log accepts choices only from the domains of your site. If the status stays empty, check the domain list on the Settings tab.
5. Make it yours
Section titled “5. Make it yours”On the Appearance tab choose the layout, the colours and the languages. Add a link to your cookie policy. See Appearance.
Changes you save in the dashboard reach your site within 5 minutes. The line of code never changes.